
Fall Planting in Northern Virginia: Trees, Shrubs, and Mulch Done Right
Fall is the best time to plant trees and shrubs in Northern Virginia. Soil stays warm into November and drives root growth while cooler air slows water loss from leaves, so woody plants establish roots before summer heat arrives. Set the root flare at grade, mulch two to three inches deep, and water until the ground freezes.
The short answer: Plant from early September through late November, allowing roughly six weeks of root growth before the soil turns cold. Dig a hole two to three times as wide as the rootball and no deeper. Find the root flare and keep it at or slightly above finished grade. Mulch two to three inches, never against the trunk. Water deeply and infrequently for two growing seasons.
Lawn Theory installs and maintains woody plants across Fairfax, Loudoun, and Prince William counties, where clay subsoil, mature canopy, and severe deer pressure make placement and technique matter more than plant price. Our tree and shrub care and mulching and bed maintenance crews spend much of every fall correcting the same installation errors on plants somebody else put in three years earlier.
Key Takeaways
- Soil temperature lags air temperature, so roots keep growing weeks after the top of the plant shuts down.
- Allow roughly six weeks of root growth before the ground gets cold, which usually means finishing by late November here.
- Planting too deep is the leading cause of slow decline in suburban landscapes. The root flare must stay visible at grade.
- In clay, dig wide and shallow. A deep hole filled with fluffy amended soil behaves like a bathtub.
- Mulch two to three inches, pulled back from the trunk. Volcano mulching is a slow method of killing a tree.
- New plants need water for two growing seasons, and fall plantings still need it until the ground freezes.
- Save heavy pruning for late winter. Fall cuts push tender growth that winter kills and remove next spring’s flower buds.
- Deer pressure in much of Loudoun, Fairfax, and Great Falls is severe enough that no plant list is a guarantee.
Why Fall Beats Spring for Woody Plants
The case comes down to a mismatch between air and soil temperature. Air cools quickly in September and October, but soil holds heat and stays biologically active past the first frost. A tree planted in October has a top winding down and a root zone still working.
Warm Soil, Cool Air, Less Stress
Every transplant arrives with a drastically reduced root system. That imbalance between a full canopy and shrunken roots is the whole problem of transplanting, and it is why summer planting is punishing: hot, dry air pulls water from leaves faster than damaged roots can replace it.
Fall flips it. Shorter days cut transpiration demand, rainfall is usually more reliable than in August, and the soil is still warm enough for root growth. The plant rebuilds roots instead of defending leaves, so by the following June it has had two root-growing seasons instead of one. Fall soil is also at its most workable, meaning less compaction damage to the walls of the hole than you get fighting August clay in a Herndon or Reston back yard.
The Honest Exceptions: When Spring Is Better
Fall is not universally better, and any contractor who says so has stopped paying attention. These genuinely do better waiting:
- Marginally hardy plants. Anything at the cold edge of its range wants a full growing season before facing a winter.
- Broadleaf evergreens in exposed sites. They lose water all winter, so a windy spot plus immature roots means desiccation and leaf scorch.
- Shallow-rooted plants. These heave. Repeated freeze-thaw cycles physically lift a shallow rootball and expose it to drying wind.
- Bare-root and some field-dug species. Certain plants move in spring for good reason. If a grower will not sell you a tree balled and burlapped in October, take that as information.
- Any site with unresolved drainage. Wet clay plus winter equals root rot. Our guide to standing water in the yard covers the diagnostics.
A heaved plant was not killed by cold. It was pushed up by expanding ice and then dried out. Prevent it by planting early enough for roots to knit in, mulching to moderate temperature swings, and pressing lifted rootballs back down after a hard freeze-thaw week.
How Late Is Too Late? The Six-Week Rule
Ignore anyone offering a single calendar date. Allow roughly six weeks of root growth before the soil gets cold. Root activity slows sharply once soil drops into the low forties, so you count backward from whenever that happens in a given year.
For most of the region that means early September through mid-November, with late November acceptable for tough container-grown deciduous material in a protected site. Push past that and you are cold-storing a plant and hoping. Adjust for your site: higher, exposed western Loudoun County runs cooler and windier, tight lots in Arlington and Alexandria hold heat, and a north-facing slope cools faster than a south-facing one on the same property.
Fall Planting Task Calendar for Northern Virginia
Doing the right task in the wrong month is how a bed looks finished in October and disappointing in May.
| Period | Task | Why timing matters | Risk of doing it late |
|---|---|---|---|
| Early September | Soil test, site and drainage evaluation, design, order plants, call 811 | Test results, utility marking, and drainage correction all need lead time. Nursery selection is at its best. | You buy what is left on the lot in November and plant into a site you never evaluated. |
| Early September | Bed expansion, edging, grading, lawn renovation and overseeding | Earthwork precedes planting so you are not trenching through fresh rootballs. | Overseeding past the window germinates thin, and grading after planting damages new roots. |
| Late September | Plant balled-and-burlapped trees, evergreens, broadleaf shrubs | Maximum remaining root-growing time. Evergreens especially want the extra weeks. | Evergreens enter winter losing water through foliage with immature roots. |
| October | Plant most deciduous trees and shrubs, install perennials, begin mulching | Warm soil, cool air, reliable rainfall. The sweet spot for most woody material. | Compressed root-growth window and heavier reliance on supplemental watering. |
| October | Plant spring-flowering bulbs once soil has cooled | Cool soil lets bulbs root without pushing premature top growth. | Bulbs in warm September soil can sprout foliage that winter damages. |
| November | Final deciduous planting, finish mulching, keep watering, manage leaves, add trunk guards | Mulch before hard freezes moderates soil temperature and reduces heaving; guards stop buck rub. | Unmulched plantings heave, matted leaves smother turf, and winter burn shows up in February. |
If you are combining planting with turf work, the schedules overlap. Our fall lawn renovation guide covers seeding, and sod installation and lawn renovation is the option for instant coverage around a new bed.
Planting Depth and the Root Flare: The Most Important Section Here
If you read nothing else, read this. The leading cause of slow decline and premature death in suburban landscape trees is not disease, drought, or deer. It is planting too deep and burying the root flare. The damage is invisible for a year or two, which is exactly why it keeps happening.
A buried flare holds constant moisture against bark that evolved to be dry, inviting decay at the base of the trunk. It smothers the fine surface roots where most oxygen exchange happens. And it encourages roots to grow up and around the trunk, producing girdling roots that slowly strangle vascular tissue. The tree can look fine the whole time.
How to Find the Root Flare
The root flare is where the trunk widens and the first structural roots branch away. On a correctly planted tree it is visible above the soil line. The trunk should meet the ground the way a wine glass meets a table, not the way a telephone pole meets the ground.
- Look at where the trunk enters the rootball. If it goes straight in with no widening, the flare is buried inside the ball.
- Gently excavate soil off the top until you expose the first main structural roots.
- Measure from that point to the bottom of the ball. That, not the container height, is your planting depth.
- Discard the soil you removed. Do not put it back after planting.
The Nursery May Have Already Buried It
Trees are frequently potted up or field-dug with several inches of extra soil over the flare, so the true top of the rootball can sit well below the container surface. Plant that ball flush with your grade and you have set the tree too deep while following the tag exactly. That is why excavating the top of the rootball is step one, not an optional refinement. On larger caliper trees it is normal to remove a meaningful amount before the flare appears.
Set the Flare At or Slightly Above Grade
Target the flare at finished grade or an inch or two above, especially in heavy clay. Slightly high is a safe error; slightly low is not. Settling only works one direction, so the bottom of the hole must be undisturbed native soil rather than fluffed backfill. Lay a shovel handle across the hole to check, because sighting by eye consistently produces plants that are too deep.
Dig Wide, Not Deep
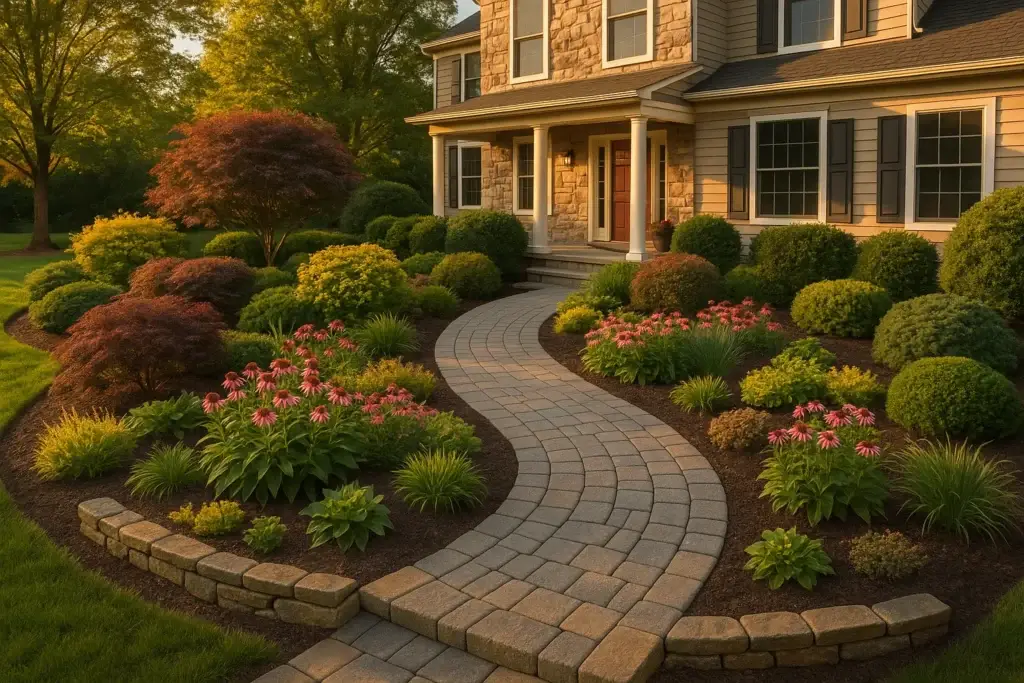
The hole should be two to three times the width of the rootball and no deeper than the ball measured from the flare. Establishing roots grow laterally and mostly stay in the top foot of soil, so a wide hole with loosened, sloping sides gives them an easy path outward while a narrow one gives them compacted clay at four inches. Extra depth buys nothing but settling risk and poor oxygen. Shape it like a shallow saucer, not a bucket. For shrub beds, skip individual holes entirely and prepare the whole bed as one unit, which is how our landscape design and installation crews handle mass plantings.
Circling Roots, Burlap, and Wire Baskets
- Container plants: roots circling the perimeter keep circling and eventually girdle the plant. Score the sides vertically in three or four places and tease the bottom loose. Being decisive feels violent and is correct.
- Severely pot-bound plants: butterfly the bottom third or shave the outer layer. A plant left in the shape of its pot never leaves it.
- Burlap: set the ball in the hole first, then cut burlap away from the upper third to half. At the trunk it wicks moisture and, if synthetic, never decomposes.
- Wire baskets: once positioned and partly backfilled, cut away the top rings. Wire at the flare girdles the trunk as it expands.
- Twine and tags: remove all of it. Tags left on cut into bark within a few seasons.
- Handle by the ball, never the trunk. Lifting by the stem cracks the rootball and shears fine roots.
Backfill: Do Not Heavily Amend Clay
The most persistent bad advice in residential planting is to fill the hole with rich compost and topsoil. In sand it is harmless. In our clay it creates the bathtub effect: water moves between soil textures reluctantly, so a loose organic pocket surrounded by dense clay accepts water from above far faster than it releases it sideways. Rain collects and sits. Meanwhile roots find the pocket more hospitable than the clay, stay inside, and circle exactly as they would in a container. You have built a large underground pot with poor drainage.
Backfill instead with the native soil you removed, broken up and free of clods and rocks. Improve organic matter bed-wide and at the surface rather than in a concentrated pocket. Our post on managing clay soil in Northern Virginia explains why texture transitions matter here.
Backfill in stages: soil to half depth, water in to settle voids, then finish. Firm with your hands, do not stomp, which undoes the point of a wide hole. Build any watering berm at the outer edge of the rootball, never as a soil ring against the trunk.
Worth doing first: a routine soil test through the Virginia Tech Soil Testing Laboratory costs ten dollars per sample for Virginia residents and returns pH, phosphorus, potassium, calcium, magnesium, micronutrients, estimated cation exchange capacity, and lime and fertilizer recommendations, usually within three working days of receipt. Residential sampling guidance is in VCE 452-129, and your local Extension office supplies boxes and forms.
Staking Is Usually Optional and Frequently Overdone
Trunk movement is how a tree builds taper and strength, so a rigidly staked tree ends up weaker. Stake only when the tree will not stay upright, the site is very windy, or the rootball is small relative to the canopy. Use broad flexible ties, allow movement, and remove all hardware within a year. We cut girdling staking material off trees every fall.
Planting Into Northern Virginia Clay
Much of the region sits on dense, fine-textured subsoil, and on newer subdivisions the good topsoil was scraped and only partly returned. What is left under a Brambleton or McLean lawn is often compacted subsoil under a thin veneer. Trees do not care that it is not your fault.
Test Drainage Before You Plant
This takes ten minutes and prevents the most expensive kind of mistake. Dig a test hole about a foot deep and a foot across where you intend to plant, fill it, let it drain completely, then fill it again and time the drawdown.
- Drains within a few hours: normal. Plant conventionally.
- Takes most of a day: slow but workable. Choose plants tolerant of heavy soil, plant slightly high, mulch generously.
- Still holding water after a full day: do not dig a conventional hole. This site needs raised planting or drainage correction first.
NVSWCD guidance on wet yards is worth reading before you buy plants, because it separates perched water sitting on a compacted layer from a genuinely high seasonal water table. Only one of those is fixed by loosening soil. VCE BSE-194 covers the underlying soil-water physics.
Do Not Glaze the Sides of the Hole
Digging wet clay with a smooth blade or an auger polishes the walls into a slick, sealed surface that roots struggle to penetrate and water struggles to cross. You have effectively fired a clay pot in the ground. Avoid digging saturated clay; if a handful ribbons out like modeling clay, wait a few days. Then roughen the sides and bottom with a fork and slope the sides outward instead of cutting them vertically.
When the Hole Holds Water: Berm and Plant High
The instinct is to dig deeper, as if you could get past the problem. In our soils that just builds a deeper sump. Go up, not down. Raised planting means excavating shallowly, setting the rootball so a meaningful portion sits above existing grade, then mounding soil around and over the sides and tapering out over several feet so it reads as a gentle rise. The flare still stays visible, and a wide berm beats a steep narrow mound that dries out and erodes.
If the whole area is wet rather than one spot, plants are not the answer; that is a grading problem belonging to drainage solutions and grading. Before moving water, know that Fairfax County treats drainage directed from private systems onto neighboring properties as a civil matter between property owners, and NVSWCD warns that redirecting runoff without soaking it into the soil can negatively impact neighboring properties. Solving your wet corner by sending it downhill is not solving it.
Mulch, Done Right
Mulch is the highest-return, lowest-cost thing you can do for a new planting, and the most commonly botched. Done right it moderates soil temperature, conserves moisture, suppresses weeds, keeps trimmers off bark, and feeds the soil as it breaks down. Done wrong it kills the plant it was meant to protect.
Two to Three Inches, Never Against the Trunk
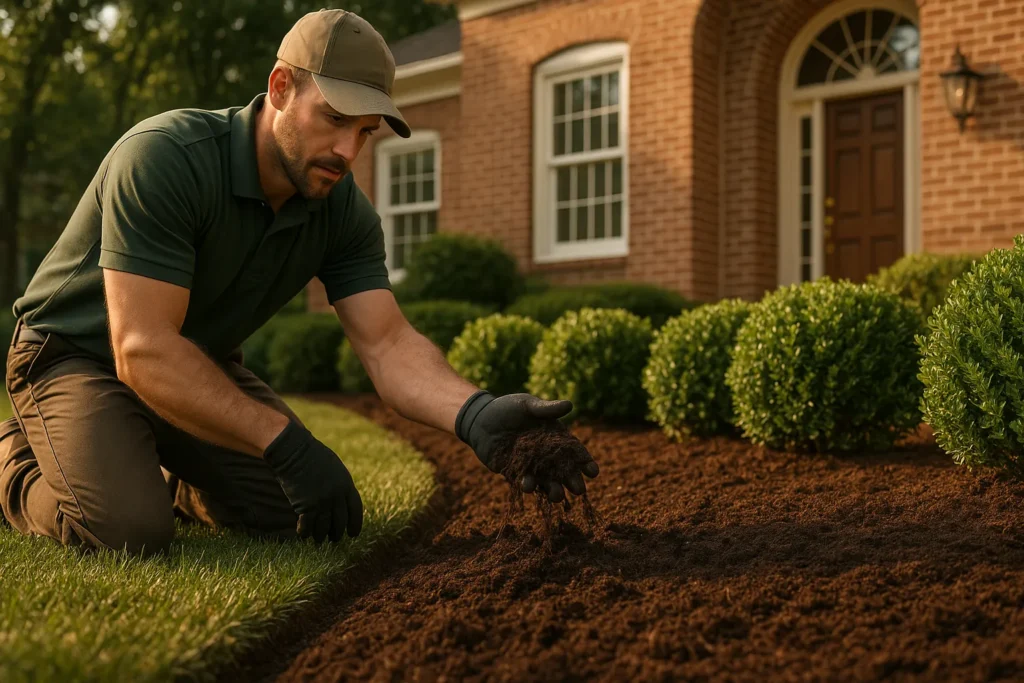
Target two to three inches across the bed, kept several inches clear of trunks and stems. On heavy clay that already holds moisture, lean shallow; on a fast-draining sunny slope go deeper. Fine double-shredded hardwood mats down and should go thinner than coarse nuggets. Extend mulch toward the drip line where you can, because a wide shallow ring does far more good than a narrow deep one and it keeps string trimmers away from bark, an underrated killer of young trees.
Volcano Mulching: What It Actually Does
You have seen it on every commercial property in the region: a cone of mulch piled a foot high against a trunk. It looks tidy and installs fast, which is why it spread. Here is the actual chain of harm:
- It holds moisture against bark not adapted to being wet, softening it and opening the door to decay at the base of the tree, structurally the worst possible place.
- It buries the root flare, producing the same outcome as burying it in soil, just more slowly.
- It encourages girdling roots. Roots grow up into the moist cone and circle the trunk, compressing the tissue that moves water and sugars. The tree starves slowly, presenting as thinning canopy and early fall color.
- It houses rodents. Voles nest in deep mulch and chew bark all winter. A ring of girdled bark found in March is often fatal.
- It can repel water. Aged piles develop a hydrophobic crust that sheds rain outward, so the tree is dry inside a mound that looks like it is conserving moisture.
The correction is free: pull mulch back until you can see the flare and the top of the structural roots, then redistribute the excess into the bed. Where this has been done for years, expect bark damage, girdling roots, or both. Some of it can be corrected. Some cannot.
Choosing a Mulch Type
| Mulch type | Behavior and best use | Watch out for |
|---|---|---|
| Shredded hardwood | Regional default. Knits together, stays on slopes, adds organic matter at a moderate rate. | Mats and crusts if applied thick or refreshed without fluffing. Stay shallow on clay. |
| Pine bark nuggets | Coarse, slow to break down, excellent air exchange, long-lasting around established shrubs. | Floats and washes out of sloped beds and downspout paths onto walkways. |
| Pine straw | Light, breathable, does not compact, slightly acidifying. Traditional around acid-loving broadleaf evergreens. | Blows around in exposed sites, needs frequent topping, flammable when very dry. |
| Undyed hardwood or composted bark | Ages to neutral brown and feeds soil biology. Preferred where soil improvement is the goal. | Color fades within a season, which some homeowners read as looking tired. |
| Dyed mulch | Holds color far longer, which is why it dominates HOA-visible front beds. A cosmetic advantage only. | Often reprocessed wood rather than bark, and colorant can stain hardscape and siding. |
| Shredded leaves and leaf mold | Free, excellent conditioner for back beds and natural areas. Use shredded, not whole. | Whole leaves mat into a water-shedding layer. Not a formal front-yard look. |
| Stone and gravel | Permanent, no reapplication, appropriate against structures and in specific design contexts. | Radiates heat, adds no organic matter, hard to remove. Poor choice around young trees. |
Avoid sheet plastic under mulch entirely: it blocks air and water exchange and leaves plastic shreds in your soil permanently. Landscape fabric is a milder version of the same problem, and weeds simply root in the mulch above it.
Refresh, or Just Fluff?
The annual reflex to dump fresh mulch on every bed is how beds end up six inches deep. Measure what is there with a trowel before ordering anything.
- Under two inches: add material to bring the bed back to depth.
- Two to three inches but matted and faded: do not add. Break the crust with a cultivator to restore infiltration and freshen the color underneath. This is the most overlooked bed task in the region.
- Over three inches: remove material, especially near trunks and crowns.
- Any depth where you cannot see the flare: excavate around the trunk regardless of what the bed measures.
On clay, over-mulching compounds an existing problem. Clay already holds moisture and drains slowly, so four inches of moisture-retaining mulch keeps the root zone wetter, longer, with less oxygen all winter. That is a direct route to root rot in a plant that was fine in year one. Our mulch calculator converts bed dimensions and target depth into cubic yards so you are not guessing at the supply yard.
Bed Edging
A spade-cut trench four to six inches deep with a clean vertical face on the bed side keeps mulch out of turf and stops fescue creeping into the bed. It costs only labor and needs redoing once or twice a year. Steel, aluminum, and paver edging are more permanent and worth it where a bed meets a walkway or pathway; plastic roll edging generally heaves out within a couple of our freeze-thaw winters. Edge in fall while soil works easily, then mulch, not the reverse. Recurring edge upkeep, bed weed control, and mulch refresh are what bed maintenance in Ashburn and bed maintenance in Leesburg cover on a visit schedule.
Watering New Trees and Shrubs Through the First Two Years
Deep and Infrequent, at the Rootball
For at least the first season, water must land on the rootball itself, not the surrounding bed. The advice to water at the drip line applies to established trees. A new tree has nearly all of its absorbing roots inside the original ball, which is often a different soil texture than the backfill and can go dry while the soil around it is damp.
Apply slowly enough to soak rather than run off: a hose at a trickle for fifteen or twenty minutes, a slow-release watering bag, or a soaker loop over the ball. Then wait, and check by pushing a screwdriver into the rootball before watering again. Widen the zone outward in year two as roots expand. An irrigation and sprinkler system designed for turf is rarely adequate alone, because turf heads deliver frequent shallow water in exactly the pattern woody plants do not want. A dedicated drip zone for beds is the better arrangement.
How Long Establishment Actually Takes
A useful working rule among horticulturists is roughly one year of establishment per inch of trunk caliper. A two-inch caliper tree is not established for about two years; a four-inch tree, impressively mature on delivery day, is on a four-year clock.
That carries a design consequence worth stating plainly: smaller trees frequently catch up to and pass larger ones planted the same day, because they keep a higher proportion of their roots and spend less energy recovering. If you want a healthy tree in eight years rather than a big tree on installation day, buy the smaller one. Shrubs are faster, generally a season or two, but larger containers still take longer than small ones.
Fall Plantings Still Need Water Until the Ground Freezes
This is where most fall plantings quietly fail. The weather turns cool, leaves drop, the hose gets coiled, and everyone assumes the plant is done for the year. It is not: roots are still growing and the plant is still losing water, especially evergreens.
Keep watering through October and November whenever the soil is not frozen and rain has been thin. A dry, open winter with little snow cover is hard on new plantings, and watering during a mid-winter thaw is legitimate for broadleaf evergreens, which transpire all winter with no leaf drop to reduce demand. If you run an in-ground system, shutting it down removes your safety net, so plan on hand watering afterward and drain the hose on freezing days. The shutdown side is covered in our sprinkler winterization guide.
Right Plant, Right Place for Northern Virginia
Perfect technique cannot rescue a plant that should never have gone in that spot. Site selection is decided before anyone picks up a shovel, and it is where most long-term landscape regret originates.
Map Sun and Shade Honestly
Full sun means six or more hours of direct sun; part sun and part shade both land in the three-to-six-hour range; full shade is under three hours. Two local complications: the mature oak and tulip poplar canopy across older neighborhoods in Fairfax County, Vienna, Falls Church, and Arlington means many yards described as sunny are actually part shade all season, and assessing light before spring leaf-out will overestimate it badly. Account for reflected heat too, since a bed against a south-facing brick wall or between a driveway and a walk runs hotter and drier than an open lawn bed on the same property.
Mature Size Versus the Spot You Picked
Call it the boxwood-under-the-window problem. Three shrubs bought at eighteen inches and spaced evenly under a front window look correct. Eight years later they are five feet across, touching, pressed against the siding, and blocking the window, and the annual response is shearing them into cubes, which gradually destroys their structure and interior foliage.
- Look up mature height and width before buying, and believe them. Pick a cultivar that fits rather than planning to prune it into submission.
- Space so mature canopies just meet. A new bed should look slightly sparse; beds that look full on day one are overplanted.
- Keep foundation plants off the wall for air movement and access, at least half the mature width plus room to walk.
- Check overhead for utility lines, roof overhangs, and second-story windows, and consider root space: a tree in a narrow strip between a driveway and a walk will lift both.
Starting from a blank slate? Working out the layout before buying saves real money. Our backyard style quiz clarifies direction quickly, and front yard landscaping in Northern Virginia covers curb-appeal planning.
Deer: An Honest Conversation
Deer pressure across much of Loudoun and Fairfax, and acutely in Great Falls, Clifton, Oakton, and the wooded edges of most subdivisions, is severe. Here is the honest version plant tags will not give you: there is no deer-proof plant, and under enough pressure deer will eat almost anything. Published resistance lists describe tendencies, not guarantees, and were compiled under conditions that may not match your street.
- Observe your own block. What survives untouched nearby beats any regional list.
- Physical exclusion is the only reliable protection: fencing, cages, or trunk guards. Everything else adjusts probability.
- Protect new plantings specifically. A plant that shrugs off deer once established can still be browsed to nothing in its first winter.
- Buck rub is a separate problem. Males shred bark on young trunks in autumn and can girdle a tree overnight, so trunk guards through fall are cheap insurance.
- Repellents work conditionally, requiring rotation among actives and reapplication after rain and new growth. That is a maintenance commitment, not a purchase.
Salt, HOAs, and What Is Underground
Beds along driveways, sidewalks, and street frontage take deicing salt every winter as spray and runoff. Damage shows in spring as browning on the pavement-facing side or as stunting and marginal leaf scorch. Choose tougher material for those specific beds, keep fine-foliage evergreens off the spray line, grade so meltwater sheds away rather than into them, and water well in spring to leach accumulated salts.
A large share of housing here sits under an HOA. Communities in Prince William County and newer Loudoun developments may maintain approved plant lists, restrict bed shapes, specify mulch color, prohibit the fencing you want for deer, or require architectural review for anything visible from the street. Read the covenants before you buy plants. And separately, more urgently: call 811 before you dig. Marking is free and required and takes a few business days, which is one more reason the early-September planning step matters, because gas, electric, cable, and irrigation lines all live at planting depth.
Where Natives Fit
Native trees and shrubs are broadly well matched to our climate and soils, support pollinators and birds, and often need less intervention once established. They are not maintenance-free, and native does not mean deer-resistant. Selection, siting, and the realistic tradeoffs are covered in native plant landscaping in Northern Virginia, so treat fall as the ideal season to act on that guidance.
Fall Pruning: Mostly, Do Not
Fall feels like cleanup season, so out come the pruners. But pruning is a growth stimulus. Cut hard in early fall while the plant can still respond and it pushes soft shoots with no time to harden off, which the first serious freeze kills. The plant has spent stored energy on tissue it lost and enters winter weaker, and late-season wounds close more slowly.
Safe in Fall Versus Wait for Late Winter
- Safe now: the three Ds, meaning dead, damaged, and diseased wood. Removing diseased material also reduces overwintering inoculum.
- Safe now: genuine hazards such as broken limbs and branches over a roof or walkway that could fail under snow and ice load.
- Safe now: small structural corrections on young trees, spent perennial foliage, and removal of old ties, stakes, and tree wrap.
- Wait: structural pruning, thinning, size reduction, and rejuvenation cuts on most deciduous trees and summer-blooming shrubs, all of which belong in late winter dormancy when branch structure is visible and the growth response arrives at the right moment in spring.
Prune Spring Bloomers in Fall and You Lose the Flowers
This produces more disappointed April phone calls than any other pruning error. Shrubs that flower in early spring set their buds on the previous season’s wood, during the prior summer, so by fall next spring’s flowers already exist on the plant. Prune then and you cut them off; the shrub stays perfectly healthy and simply does not bloom.
The rule is simple: prune spring-flowering shrubs right after they finish blooming, and summer bloomers in late winter. If you are unsure which a plant is, watch it for a year. Boxwood and other broadleaf evergreens are generally best worked in late winter to early spring and benefit from thinning for interior air movement rather than tight shearing. Ongoing shaping and health monitoring is what tree and shrub care in Great Falls and tree and shrub care in Vienna handle on a schedule.
Leaf Management, Bulbs, and Fall Color
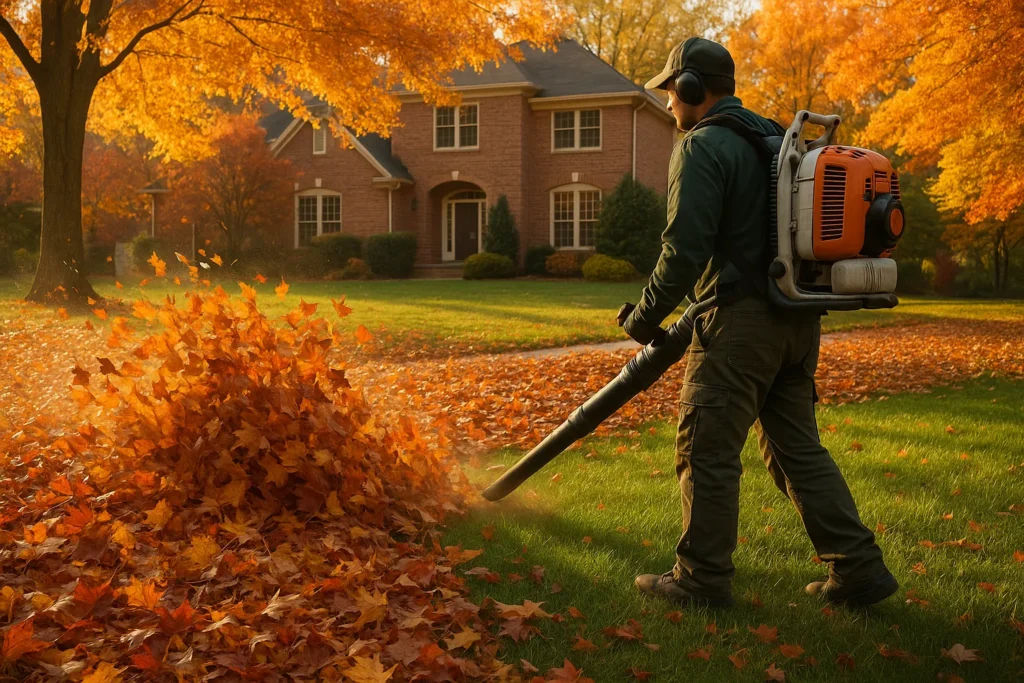
Run a mower over dry leaves and you get one of the better soil amendments available. Shredded leaves break down into leaf mold, improve structure over time, and work well as mulch in back beds and naturalized areas. In a clay landscape, adding organic matter at the surface year after year is genuinely how soil improves, and leaves are the cheapest input you will ever have. Spread over new plantings, a shredded layer moderates soil temperature and reduces heaving; keep it off crowns and stems, same as any mulch.
Left whole and wet, leaves pack into a dense, water-shedding mat. On tall fescue that means blocked light and air, weak grass going into winter, and thin patches or disease in spring, which is the last thing you want after a fall renovation. In beds, matted leaves hold moisture against stems and shelter voles working on your new plants. Clear leaves off turf and out of crowns repeatedly through the season rather than waiting for one heroic December cleanup. Recurring leaf removal and seasonal cleanup exists because timing matters more than volume, and our post on seasonal cleanup in Virginia covers scheduling and disposal.
Bulbs and cool-season color. Spring-flowering bulbs go in once soil has cooled, generally mid-October onward, and can be planted until the ground is hard to work; September soil is warm enough to risk premature top growth. Plant at roughly two to three times the bulb’s height, pointed end up, in soil that drains, since bulbs rot in wet clay. In heavy soil plant shallower and improve drainage across the whole planting area rather than digging a deep hole per bulb, which reproduces the bathtub problem in miniature. Where squirrel and vole pressure is high, hardware cloth or bulb cages are the reliable answer, and deer browse emerging foliage in spring. Cool-season annuals such as pansies, violas, and ornamental kale go in the same window and carry color into spring; use them near entries and along a lit walkway or entry sequence where they get seen.
Common Fall Planting Mistakes in Northern Virginia
Most planting failures in this region are not caused by bad plants or bad weather. They are caused by decisions made in the first twenty minutes of installation, and they usually do not become visible for one to three years. That delay is what makes them so common.
| Mistake | What it looks like in one to three years | How to avoid or correct it |
|---|---|---|
| Planting too deep, root flare buried | Thin canopy, early fall color, slow decline, sometimes girdling roots at the trunk base | Find the flare before you dig. Set it at or slightly above finished grade, even if the rootball sits proud of the hole. |
| Digging a narrow, deep hole | Plant settles below grade, roots circle instead of spreading, water pools at the rootball | Dig two to three times the rootball width and no deeper than the rootball height. Width matters, depth does not. |
| Leaving wire baskets, burlap, or twine on the upper rootball | Trunk girdling and stem constriction years later | Remove twine entirely. Cut away the top third of any basket and fold burlap down off the rootball after the plant is set. |
| Heavily amending the backfill in clay | Water collects in the amended pocket and roots refuse to leave it | Backfill with the native soil you removed. Improve a whole bed if you want better soil, not a single hole. |
| Volcano mulching against the trunk | Bark stays wet, rot and rodent damage, roots grow into the mulch instead of the soil | Keep mulch two to three inches deep and pull it back so the flare and trunk base stay visible and dry. |
| Adding fresh mulch every year without checking depth | Beds build to five or six inches, roots suffocate, water never reaches soil | Measure first. Fluff and redistribute existing mulch most years; top up only where it has genuinely broken down. |
| Stopping watering because the weather turned cool | Roots dry out before the ground freezes and damage appears the following summer | Keep watering new plantings until the ground freezes, then resume in spring. |
| Choosing by pot size instead of mature size | Foundation shrubs swallow windows, trees crowd rooflines and utilities within a decade | Plant for the mature dimensions on the tag and accept that a new bed should look sparse in year one. |
Doing It Yourself Versus Hiring It Out
A homeowner with a spade, a tarp, and a willingness to dig a wide hole can plant shrubs and small trees well. The work is not technically difficult. What it demands is discipline about depth, width, and mulch, which is exactly where most installations go wrong.
Hiring the work out makes more sense as caliper and quantity increase. A balled-and-burlapped tree can weigh several hundred pounds, and setting it at the correct height once is far easier than lifting it back out. Site access, slope, and bed preparation across a whole frontage also scale badly for one person with a wheelbarrow.
What actually drives the cost
- Plant size and caliper. Larger stock costs more to buy, move, and set, and it establishes more slowly than smaller stock.
- Quantity and bed length. A whole-bed installation carries different preparation costs than replacing three shrubs.
- Site access. A backyard reachable only through a gate changes how material moves.
- Soil and drainage condition. Compacted builder fill or a wet low area may need correcting before anything is planted.
- Bed preparation and edging. Establishing a new bed differs from planting into an existing one.
- Whether irrigation exists. New plantings without reliable irrigation need a hand-watering plan for two years.
Use the mulch calculator to size a delivery before you order, and the backyard style quiz if you are still deciding what the space should become. For a specific scope, a landscape design and installation walkthrough produces a written, line-item estimate.
Frequently Asked Questions
When is it too late for fall planting in Northern Virginia?
The practical guide is to give roots roughly six weeks of growing time before the ground gets cold. In this region that usually means woody plants go in comfortably through October, with the window narrowing as November progresses. Container stock is more forgiving late than balled-and-burlapped stock, and evergreens are less forgiving than deciduous material because they keep losing water all winter.
Can I plant trees and shrubs in November?
Often yes, particularly deciduous plants in containers, provided the soil is still workable and you keep watering until it freezes. What you should not do is plant late and then walk away. Late plantings carry more risk of winter heaving, so check them after hard freeze-thaw swings and press any lifted rootball back down.
How deep should a tree actually be planted?
The root flare, meaning the point where the trunk widens into the first structural roots, should sit at or slightly above finished grade. Nurseries frequently bury the flare in the container or ball, so you may need to excavate the top of the rootball to find it. If you cannot see the flare after planting, the plant is too deep.
How deep should mulch be, and how often should I add more?
Two to three inches is the working range, kept off the trunk and stems. Most Northern Virginia beds do not need new mulch every year. Measure what is already there first. If the bed is at depth, fluff and redistribute it rather than adding another layer on top.
Is volcano mulching really that damaging?
Yes, and the damage is slow enough that most homeowners never connect cause to effect. Mulch piled against bark holds moisture against tissue that is meant to stay dry, which invites rot and gives rodents cover to chew. It also encourages roots to grow up into the mulch instead of out into soil, which leaves the plant less stable and more drought-sensitive.
Should I amend the backfill when planting into clay?
Generally no, not for an individual planting hole. Heavily amended backfill in surrounding clay creates a pocket that holds water and discourages roots from crossing into native soil. If you want better soil, improve an entire bed rather than one hole. Read more about how local soil behaves in our guide to clay soil and soil testing.
How often do new trees and shrubs need watering?
Deep and infrequent beats light and daily. Water at the rootball for the first season, because that is where the roots still are, then widen as the plant establishes. A common working rule is roughly one year of establishment per inch of trunk caliper, so a two-inch tree deserves attention for about two years.
Can I prune in the fall?
Limit fall pruning to dead, damaged, and diseased wood. Heavy pruning can push tender growth that winter then kills, and spring-blooming shrubs set their flower buds the previous season, so autumn pruning removes next spring’s display. Save structural pruning for late winter dormancy.
What should I do about deer?
Be realistic. Deer pressure is heavy across much of Loudoun County, western Fairfax, and Great Falls, and under enough pressure deer will eat plants marketed as deer-resistant. Plant selection helps at the margins, but physical protection during establishment is what reliably works. Expect to protect new plantings through their first winters.
What if my planting area holds water after rain?
Do not plant into it and hope. Standing water means the site drains poorly, and most woody plants will decline in saturated soil. Diagnose the cause first using our guide to standing water and yard drainage, then either correct the drainage or plant on a raised berm above the wet zone.
Get the Hole Right and the Rest Gets Easier
Fall planting rewards preparation more than it rewards spending. A wide shallow hole, an exposed root flare, native backfill, two to three inches of mulch pulled back from the trunk, and consistent water until the ground freezes will carry a plant further than any premium nursery stock installed carelessly.
Pair the work with the rest of your fall program. Beds and turf compete for the same weekends, and the fall lawn renovation calendar overlaps directly with planting season. Falling leaves arrive next, which is where leaf removal and seasonal cleanup keeps new beds from smothering.
Lawn Theory installs and maintains trees and shrubs and manages mulching and bed maintenance across Fairfax County, Loudoun County, Prince William County, Arlington, and Alexandria. If you would rather have the depth, spacing, and drainage decisions made on site, request a property walkthrough and you will get a written, line-item estimate. You can also browse ongoing lawn care services, learn about the local team, or read more guidance on the Lawn Theory blog.
Keep Reading: Lawn Care
 Lawn Care
 Sprinkler System Winterization in Northern Virginia: Timing, Methods, and What Goes Wrong
Sprinkler winterization in Northern Virginia is about timing, not a fixed date. How to pick your shutdown week, how the three drainage…
 Lawn Care
 The Fall Lawn Renovation Calendar for Northern Virginia: Dates, Seeding Rates, and Soil Temperature
Virginia Cooperative Extension puts the Northern Virginia seeding window at the last week of August through mid-September. Here are the exact dates,…
 Lawn Care
 Clay Soil and the $10 Soil Test Every Northern Virginia Lawn Needs
Most Northern Virginia lawns struggle from builder compaction, not clay itself. Here is how the $10 Virginia Tech soil test works, how…
Want this handled by the crew that wrote the guide?
Veteran-owned. Licensed & insured. Free walkthroughs across Northern Virginia — quotes in 24–48 hours.
Get Your Free Estimate