
Landscape Lighting Design for Northern Virginia Homes: A Practical Planning Guide
Good landscape lighting design in Northern Virginia begins with a night walk of your own property, not with a fixture catalog. You plan three layers — safety, task, and ambiance — match a lighting technique to each surface, then size a low-voltage system around that plan. Warm color temperature, correct beam spread, and integration with hardscape matter far more than the number of fixtures you buy.
The short answer: Walk your property after dark and write down three things — where you cannot see, what you want to look at, and where you actually sit. Assign a technique to each: uplight specimen trees, graze brick and stone to reveal texture, downlight from mature canopy, and use path lights only where a path genuinely needs them. Then build a 12-volt system with a transformer sized with headroom, correct wire gauge for the run length, and one consistent warm color temperature across the whole property.
Lawn Theory designs and installs low-voltage systems across Fairfax, Loudoun, and Prince William counties, and the projects that look best years later are almost always the ones where lighting was drawn on the same plan as the patio, the walkway, and the plantings. If you are starting from scratch, our outdoor lighting installation service and our broader outdoor living design and build process are built to work together rather than as separate visits.
Key Takeaways
- Most disappointing installations fail for one reason: every fixture is a path light, evenly spaced like runway markers, and nothing is lit above knee height.
- Design in three layers — safety and navigation, task, and ambiance — and decide the layers before you choose a single fixture.
- Color temperature and beam spread are the two most under-explained decisions in the whole category, and they are what make brick colonials and stone facades look right instead of blue and flat.
- Low-voltage systems live or die on transformer headroom, wire gauge, and voltage drop — and long runs are a real constraint on larger Loudoun and Great Falls lots.
- Sleeving conduit under a patio before the pavers go down costs almost nothing; cutting into a finished patio later is a different project entirely.
- Northern Virginia specifics matter: mature oak and maple canopy for downlighting, freeze-thaw heaving on fixture stakes, clay soil trenching, and HOA rules on brightness and fixture visibility.
- Better-lit entries and fewer dark hiding spots are genuine benefits, but no lighting system is a security guarantee and you should be skeptical of anyone who frames it that way.
- A landscape lighting system is a living thing — plants grow into fixtures within a few seasons, so aiming and trimming are part of ownership, not a defect.
Why Most Landscape Lighting in Northern Virginia Looks Wrong
Drive through almost any neighborhood in Vienna, Ashburn, or Burke on an early September evening and you will see the same installation over and over: eight or ten identical path lights marching down one side of a front walk at even intervals, glowing at ankle height, and nothing else. The house above them is dark. The trees are dark. The beds are dark. The only thing being lit is four feet of concrete that the homeowner could already find in the dark.
That is not a fixture problem. It is a design problem, and it comes from buying before planning. A path light is a task fixture with a very narrow job — it makes a walking surface readable and marks a change in direction. When you make it the entire vocabulary of the design, you get an airstrip. The eye reads evenly spaced identical points of light as an industrial signal, not as a landscape.
Good lighting design does the opposite. It creates variety in height, intensity, and direction. Some light comes from below, some falls from above, some skims sideways across a wall. Some areas are deliberately left dark so that the lit areas read as bright. A well-designed system usually uses fewer path lights than a bad one, and the walkway still reads better — because the surrounding trees, wall faces, and bed edges are carrying part of the load.
Plan in Three Layers: Safety, Task, and Ambiance
Every fixture you place should be assigned to one of three layers before it is chosen. This single discipline does more to improve a design than any product decision.
Layer one: safety and navigation
This layer answers a single question: can a guest who has never been here walk from the car to the front door without looking down? It covers grade changes, steps, the transition from driveway to walk, retaining wall edges, and the last few feet before a door. It is the layer that must work, and it is also the layer most people over-build. You do not need to see the whole walkway at once. You need to see the next three steps and any change in elevation.
Layer two: task
Task lighting serves an activity. Grilling surfaces, prep counters in an outdoor kitchen, a dining table under a pergola, a spot where somebody reads. Task light is brighter and more directional than the other layers, and it is almost always mounted overhead or under a counter lip rather than staked in a bed. The most common mistake here is trying to serve a task from a general-purpose bed fixture twenty feet away, which produces glare in the cook’s eyes and a shadow on the food.
Layer three: ambiance and aesthetics
This is the layer that makes a property look designed rather than lit. Uplit trees, grazed stone, silhouetted specimen shrubs, a soft glow behind a seating wall. Ambiance light is generally the dimmest layer and the one with the most fixtures, because it is doing atmospheric work rather than functional work. It is also the layer that gives you the visual payoff from inside the house, which matters enormously in Northern Virginia between November and March when you are looking out at the yard far more than you are standing in it.
The Night Walk: Design Before You Buy Anything
The most valuable hour in a lighting project costs nothing. Pick a clear night, turn off every exterior light on the house, and walk the property slowly with a notepad and a decent handheld flashlight. Here is the sequence that works.
- Park in the driveway and walk to the front door as a first-time guest would. Note every place you hesitate, look down, or reach for a handrail. Those are layer-one locations, and there are usually fewer than you expect.
- Stand at the curb and look at the house. What are the two or three features you would want a visitor to notice? A gable, a stone chimney, a specimen maple, a portico. Those are your focal points. Resist the urge to name six.
- Use the flashlight as a design tool. Have someone hold it at ground level, angled up at a tree trunk, then move it closer and farther. You will immediately learn how beam angle and distance change the result. Try it on a brick wall from six inches out and from four feet out — the difference between grazing and washing becomes obvious in about ten seconds.
- Go to the back and sit where you actually sit. On the patio chair, on the deck rail, at the dining table. Everything that will be in your field of view from that seat is a candidate for the ambiance layer, and anything that would shine into your eyes from that seat is a fixture placement to avoid.
- Look at the house from inside, through the windows you use most. A kitchen window over the sink and a family room slider are the two views most people underestimate. If the yard is a black mirror from those windows all winter, the design has missed its most-used vantage point.
- Walk to your neighbor’s property line and look back. Anything that is uncomfortably bright from there will be uncomfortably bright from their bedroom window. On the denser lots in Arlington, Falls Church, and Del Ray this is not a courtesy, it is the difference between a system you keep and a system you end up turning off.
Only after that walk should you start assigning techniques and fixtures. If you want to sketch the results before you talk to anyone, our outdoor lighting designer tool lets you work zone by zone and produces a plan you can bring to a site visit — which is a far better starting point than a photo of somebody else’s yard.
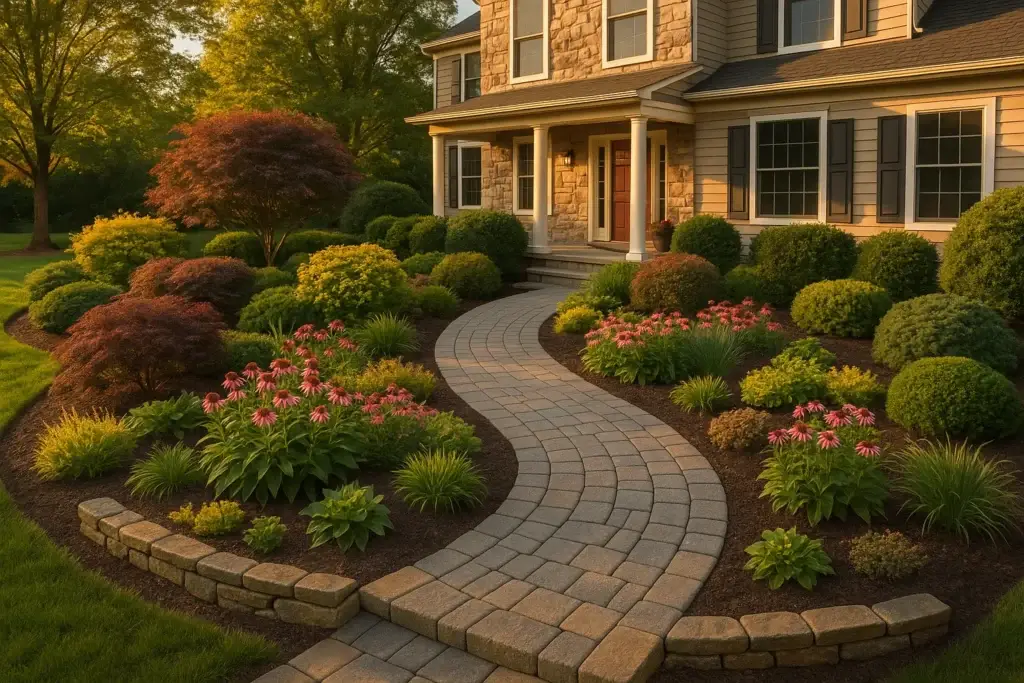
The Core Lighting Techniques, Explained Properly
These are the working vocabulary of landscape lighting. Each one has a job, a place where it belongs, and a characteristic way of going wrong. Learn the nine below and you can read — and critique — any lighting plan you are handed.
Uplighting
A fixture at or below grade aimed upward at a tree, column, or architectural feature. It is the most-used technique and the most-abused one. Uplighting works when the subject has form worth revealing — a mature oak with structural branching, a stone chimney, a portico column. It works badly on a shapeless mass of shrubs, where it just produces a glowing green blob.
The common mistake: aiming an uplight so that the beam continues past the subject and into a second-story window. Every homeowner who has done this discovers it the first night they try to sleep. The fix is either a narrower beam, a shorter throw, or a shroud or glare guard on the fixture. Two fixtures at moderate output placed on either side of a trunk almost always beat one very bright fixture at the base.
Downlighting and moonlighting
A fixture mounted high in a tree or on a structure, aimed down. When it is mounted well up inside a mature canopy so the light filters through branches and casts leaf shadows on the ground, it is called moonlighting, and it is the single most beautiful effect available in a Northern Virginia yard. Our mature oak, maple, and tulip poplar canopy is genuinely a regional asset here — a forty-foot oak in Great Falls or Oakton can do something no fixture on the ground can imitate.
The common mistake: mounting the fixture too low, which turns a soft dapple into a spotlight, and rigidly fastening the mount to a living trunk. Trees grow. Mounting hardware needs to accommodate that growth, and the cable needs slack and a service loop. This is one place where coordination with professional tree and shrub care matters, because a pruning cycle that removes the wrong limb removes your fixture’s aiming point.
Grazing
A fixture placed very close to a vertical surface — often within a foot — throwing light nearly parallel to it. The shallow angle makes every bump, joint, and irregularity cast a small shadow, and the surface reads as texture rather than as a flat plane. This is the technique for brick, fieldstone, cut stone veneer, split-face block, and heavily textured wood.
Northern Virginia is unusually well suited to grazing because so much of the housing stock is brick colonial and so much of the newer hardscape uses stone veneer on columns, chimneys, and retaining and seating walls. A grazed stone wall at dusk is the effect people are actually paying for when they say they want their house to “look like a magazine.”
The common mistake: pulling the fixture too far off the wall. At three or four feet out you are no longer grazing, you are washing, and the texture disappears. Grazing also ruthlessly exposes bad masonry — if the mortar work is sloppy, grazing will announce it.
Washing
The opposite intent: a wide-beam fixture set back from the surface, producing soft, even illumination with minimal shadow. Washing is right for smooth stucco, painted siding, a fence panel, a garage door, or a broad hedge that you want to read as a single green mass. It is a background technique — it fills the frame so that your focal points have something to sit against.
Silhouetting
Light the surface behind an object, not the object itself, so the object reads as a dark shape against a glowing background. This is how you make a Japanese maple, an ornamental grass, or a sculptural shrub look intentional. It is subtractive rather than additive, and it is the technique that most often makes people say a yard looks professionally designed without being able to explain why.
The common mistake: silhouetting something with a boring outline. The technique only rewards plants with a distinctive profile. A globe arborvitae silhouetted is just a dark circle.
Shadowing
The mirror image of silhouetting: place the fixture in front of and below an object so its shadow is thrown large onto a wall behind it. A boxwood, a fern, or a small ornamental tree in front of a light stucco or pale brick wall gives you a moving, layered shadow that changes with the breeze. It is a low-cost way to add depth to a narrow side yard where there is no room for a real focal point.
Cross-lighting
Two or more fixtures lighting the same subject from different angles, usually at lower output each. This is how you make a large or three-dimensional subject — a broad specimen tree, a stone entry column, a water feature — read as an object with volume rather than a flat lit face. It also softens the harsh single-direction shadows that make a single powerful uplight look theatrical.
Path lighting
A hooded fixture on a short stem casting a controlled pool of light downward onto a walking surface. Note the word hooded. A path light is not supposed to be visible as a light source — you should see the lit ground, not the lamp. Good path lights are placed asymmetrically, at irregular intervals, at direction changes, grade changes, and bed transitions, with pools of light that do not quite touch.
The common mistake: the runway. Identical fixtures at identical spacing down one straight line. If you take nothing else from this guide, take this: a well-lit walkway or pathway usually needs fewer path lights than you think, spaced unevenly, supported by light from trees and beds nearby.
Step and hardscape lighting
Small fixtures integrated into the structure itself: recessed into a riser, tucked under a stair nose, set beneath the cap of a seating wall, or mounted into a column. Hardscape lighting is invisible during the day and produces zero glare at night, because the light source is always concealed by the structure. It is the most elegant lighting there is, and it is dramatically cheaper when it goes in with the wall or the steps rather than after.
The common mistake: deciding you want it after the caps are set in mortar. Retrofitting a wall light into a finished seating wall means cutting stone and chasing a wire channel through a completed assembly — possible, but never as clean and never as cheap.
| Technique | Best application | Typical fixture | Common mistake |
|---|---|---|---|
| Uplighting | Specimen trees, columns, chimneys, architectural gables | In-grade or stake-mounted directional with adjustable knuckle | Beam overshoots the subject into a bedroom window; single overpowered fixture instead of two moderate ones |
| Downlighting / moonlighting | Mature oak and maple canopy over a patio, lawn, or driveway court | Tree-mounted downlight with shroud and hex louver | Mounted too low; hardware fastened rigidly to a growing trunk with no cable slack |
| Grazing | Brick, fieldstone, stone veneer, split-face block, rough timber | Narrow-beam well or bullet fixture set close to the surface | Fixture pulled too far off the wall, which turns a graze into a wash and kills the texture |
| Washing | Stucco, painted siding, fence panels, garage doors, broad hedges | Wide-beam flood set back from the surface | Used on textured masonry where grazing was needed; produces a flat, lifeless face |
| Silhouetting | Japanese maples, ornamental grasses, sculptural shrubs with strong outlines | Wide-beam wash aimed at the wall or fence behind the plant | Applied to a plant with a dull outline, which yields a dark blob instead of a shape |
| Shadowing | Boxwood, ferns, small ornamentals in front of a pale wall | Low-output spot in front of and below the plant | Too much distance to the wall, or too wide a beam, so the shadow loses its edge |
| Cross-lighting | Large or fully three-dimensional subjects: broad trees, entry columns, fountains | Two directional fixtures at unequal output and different angles | Both fixtures at full output, which erases shadow and flattens the subject |
| Path lighting | Grade changes, direction changes, bed transitions, the last approach to a door | Hooded path fixture on a short stem | Evenly spaced identical fixtures down a straight line — the runway effect |
| Step and hardscape lighting | Stair risers, seating wall caps, retaining wall faces, column recesses | Recessed riser light, under-cap linear or puck fixture | Specified after the caps are set, forcing a retrofit through finished masonry |
Zone-by-Zone Planning for a Northern Virginia Property
Techniques are the vocabulary; zones are the sentences. Most properties in this region break into the same eight or nine zones, and each one has a different job to do. Work through them in order and you will end up with a plan rather than a shopping list.
| Zone | What it needs | What to avoid |
|---|---|---|
| Front entry | The brightest point on the property, but softly delivered. A downlight from a portico ceiling or soffit plus a low-level accent on the door surround. House numbers legible from the street. | Two harsh sconces flanking the door as the only source. They glare, they age the entry, and they light your face from the side. |
| Front walkway | Path lights only at direction changes, grade changes, and bed transitions. Let uplit trees and grazed wall faces do the rest. | Runway spacing. Also avoid lighting both sides — one side, unevenly spaced, almost always reads better. |
| Driveway and entrance | Definition of edges rather than illumination of surface. Low column lights or wide-spaced downlights from canopy. Marking the apron and any turn radius. | Bollard lights every ten feet, and any fixture close enough to a tire track to be clipped by a plow or a delivery truck. |
| Specimen trees and canopy | Cross-lighting on the trunk of large trees; a downlight high in the canopy for the moonlight effect. Choose two or three trees, not all of them. | Uplighting every tree in the yard. Nothing kills a design faster than having no hierarchy of focal points. |
| Patio and seating area | Ambiance from above and from the perimeter. Downlights from a pergola or overhanging branch, wall-cap lights, and a low glow on the surrounding beds. | Any fixture that shines into a seated person’s eyes. Sit in the chair before you set the fixture. |
| Steps and grade changes | Integrated riser or under-nose lights on every step run, plus definition of the top and bottom landing. This is the one zone where you should be thorough rather than restrained. | Relying on a single distant fixture to light a stair. Shadows cast across a tread are more dangerous than no light at all. |
| Pool surround | Low, glare-free perimeter light so the coping edge and the deck transition are readable from in the water. Warm, dim, and indirect. | Bright fixtures aimed anywhere near the water surface — the reflection is blinding from a lounge chair. |
| Rear facade | Enough soft wash or graze that the house does not read as a black wall behind the patio. Usually two or three low-output fixtures, not a floodlit back wall. | A motion floodlight under the eave doing double duty. It destroys the ambiance layer every time a cat crosses the yard. |
| Side yards and utility areas | Minimal, switched or motion-activated rather than dusk-to-dawn. Enough to reach the hose bib, the meter, or the gate. | Leaving them completely dark, which is where the honest version of the security argument actually applies. |
If the rear of your property is still in the planning stage, this is exactly the moment to think about lighting and structure together. A paver patio, a pergola or pavilion, and a lighting plan drawn at the same time will always cost less and look better than three sequential projects. Our guide to designing a functional outdoor living space covers the layout side of that conversation.
Low-Voltage Systems Explained
12 volts versus line voltage
Essentially all residential landscape lighting today is low-voltage: a transformer steps household 120-volt power down to roughly 12 volts, and everything downstream of the transformer runs at that reduced voltage. The advantages are practical. Low-voltage cable does not require the same conduit and burial treatment as line-voltage wiring, fixtures can be moved and re-aimed without an electrician, and the shock risk in a wet, dug-in, root-filled environment is far lower.
Line voltage still shows up in a few places — permanently mounted architectural fixtures, some large-scale commercial work, and anything wired into a switched circuit inside the house. Those connections belong to a licensed electrician, and any new circuit or panel work will have its own permit and inspection requirements. Requirements differ by jurisdiction, so confirm with your county before you start; Virginia’s statewide exemption list for permits lives in 13VAC5-63-80 of the Uniform Statewide Building Code, and Fairfax County publishes its own when-a-permit-is-required reference. If your lighting is going in alongside a wall, deck, or patio, our companion article on patio, deck, and retaining wall permits in Northern Virginia walks through those thresholds county by county.
Transformer sizing, and why you leave headroom
The transformer is the heart of the system and the component homeowners most often under-buy. Sizing starts with total connected load: add the wattage of every fixture on the system. Standard practice is to load a transformer to roughly 80 percent of its rated capacity, not 100 percent. That margin does two things. It keeps the unit from running at its thermal limit night after night, and it leaves you the ability to add fixtures later without replacing the transformer.
Voltage drop — the real constraint on big lots
Voltage drop is what happens when electricity travels down a wire: resistance in the conductor bleeds off voltage along the way, so the fixture at the far end of a long run receives less than 12 volts. With halogen lamps this was brutally visible — the last fixtures on a run were noticeably dimmer and yellower than the first ones. Drop increases with run length, with total load on that run, and with thinner wire.
This is a genuine, everyday design problem on the larger lots common in Great Falls, western Loudoun County, and the more rural parts of Prince William. When the transformer is on the house and the far tree is two hundred feet down a sloped rear yard, drop is not a theoretical concern — it decides your wire gauge and your circuit layout. The tools an installer has are heavier gauge cable, splitting the load across more runs, moving to a higher voltage tap on a multi-tap transformer, or adding a second transformer closer to the far zone.
Wire gauge
Landscape cable is specified by gauge, and the number runs backward: a lower number means a thicker conductor and less resistance. Light-duty 14- or 16-gauge cable is what comes in a big-box kit and is only appropriate for very short runs with very small loads. Serious systems are built with 12-gauge as a working minimum, and 10-gauge or 8-gauge on the long backbone runs that feed distant zones. Direct-burial rated cable is not optional, and neither is leaving service loops at every fixture so a stake can be repositioned later without splicing.
Hub wiring versus daisy-chain
In a daisy-chain layout, the cable runs from the transformer to fixture one, then on to fixture two, then three, and so on. It uses the least wire and it is what most kits assume. The problem is that every fixture sees a different voltage depending on its position, and any fault in the middle of the chain affects everything downstream.
In a hub layout, a heavier trunk cable runs from the transformer out to a junction hub near a group of fixtures, and short individual leads fan out from that hub to each fixture. Every fixture in that group sees essentially the same voltage, brightness is consistent, and troubleshooting is a matter of checking one hub rather than tracing a chain. Hub wiring uses more cable and takes longer to install. It is also the layout that still looks correct five years on, which is why professional installers gravitate to it on anything beyond a handful of fixtures.
LED versus halogen, and why LED changed the math
Halogen landscape lamps were the standard for decades and drew substantial wattage per fixture, which meant transformer capacity and voltage drop were the binding constraints on almost every design. An LED fixture produces comparable useful light at a small fraction of that draw. The practical consequence is that transformer capacity is rarely the limiting factor anymore — a modest transformer can carry a large number of LED fixtures — and voltage drop over a given run is far less severe because the current on that run is much lower.
That freedom has a downside. Because it is now cheap and easy to add fixtures, over-lighting has become the dominant design error of the LED era. The old wattage budget imposed a discipline that no longer exists. Restraint now has to be a deliberate design choice rather than a consequence of physics.
Two other LED realities are worth knowing. First, quality varies enormously, and cheap LEDs shift color as they age — a set of fixtures that matched on day one can drift apart over several seasons, which is why buying all your fixtures from one line at one time matters. Second, many LED landscape fixtures are integrated, meaning the light engine is not a replaceable bulb; when it fails you replace a module or the whole fixture. Ask which it is before you buy, because it determines what serviceability looks like in year eight.
Color Temperature, Beam Spread, and Lumens
These three specifications decide what your lighting actually looks like, and they are the ones almost nobody explains to a homeowner before the fixtures are in the ground.
Color temperature is the decision people regret most
Color temperature is measured in Kelvin and describes whether light reads as warm and amber or cool and blue. Lower numbers are warmer. Around 2700K you get a soft, candlelit, incandescent quality. Around 3000K you get a warm white that is still clearly warm but slightly crisper. By 4000K you are into neutral territory that most people describe as looking commercial, and at 5000K and above you are in the blue-white range that reads as a parking lot or a security floodlight.
For Northern Virginia’s dominant architecture, warmer is nearly always right. Red brick, buff and gray fieldstone, tan stone veneer, painted colonial trim, and natural wood all contain warm pigments. Light them with a cool source and those pigments go dull and slightly gray. Light them warm and the brick reads red, the mortar reads soft, and the whole facade looks like it does at golden hour. A brick colonial in Vienna lit at 5000K looks like a municipal building at night. The same house at 2700K looks like a home.
The practical rule: pick one temperature for the architecture, allow at most one slightly different temperature for plant material, and write both onto the plan so that every future addition matches. Also ask about color consistency binning if you are comparing product lines — tighter binning means fixtures of the same nominal temperature actually match each other out of the box.
Beam spread: matching the angle to the subject
Beam spread is the angle of the cone of light leaving the fixture. Narrow beams concentrate output over distance; wide beams cover breadth at short range. Getting this wrong is why an expensive fixture can look worse than a cheap one.
- Narrow spot, roughly 10 to 15 degrees. For tall, narrow subjects at distance: the trunk and upper canopy of a mature oak or tulip poplar, a two-story stone chimney, a flagpole. A narrow beam is the only way to get useful light forty feet up.
- Narrow flood, roughly 25 to 40 degrees. The workhorse. Medium ornamental trees, entry columns, tall shrub groupings, grazing a two-story wall from a few feet out.
- Wide flood, roughly 50 to 60 degrees and up. Short, broad subjects at close range: a boxwood hedge, a low mass planting, washing a fence panel or a garage door, filling a bed with soft ambient light.
- Very wide, above roughly 60 degrees. Silhouette backgrounds and broad washes where you want no visible beam edge at all.
Consider the practical contrast. Uplighting a mature oak means throwing light thirty to fifty feet into a canopy — a wide flood at the base will dump most of its output onto the lower trunk and the mulch ring and produce a bright ring on the ground with a dark canopy above it. A narrow spot placed a few feet back from the trunk carries into the branches, which is where the shape actually is. Now uplight a three-foot boxwood: a narrow spot will punch a hot circle through the center and leave the sides dark. A wide flood set close will wrap the whole form evenly. Same fixture body, completely different result, and the only difference is the optic.
Lumens, not watts
Watts measure power consumed. Lumens measure light produced. In the halogen era the two tracked closely enough that people used wattage as shorthand for brightness, and the habit stuck. With LED it is meaningless — two fixtures of identical wattage can differ substantially in output, and a well-designed low-wattage fixture with good optics will outperform a poorly designed one that draws more.
Compare fixtures on lumens for brightness, on Kelvin for color, on beam angle for coverage, and on watts only when you are calculating transformer load. If a quote lists fixtures by wattage alone, ask for the lumen output and the beam angle. A designer who cannot supply those numbers is picking fixtures by habit rather than by plan.
Northern Virginia Conditions That Change the Design
Mature canopy is an asset — and a moving target
Much of the established housing stock in Fairfax and Arlington sits under substantial oak, maple, poplar, and hickory canopy. That canopy is the best downlighting platform available and it is one of the genuine regional advantages this area has over newer subdivisions. It also drops an enormous volume of leaves, and it grows. A downlight mounted to give a perfect dapple in year one may be shooting through a much denser screen by year four, and a branch that was the aiming point may be gone after a storm or a pruning cycle.
Brick and stone want grazing
The colonial and neo-colonial brick that dominates so much of this region, along with the stone veneer that appears on newer homes throughout Ashburn and Loudoun, is close to ideal for grazing. Texture is what these surfaces have and texture is what a shallow light angle reveals. If your house is brick or has any significant stone element, grazing should be on your plan before anything else on the facade.
Freeze-thaw and fixture stakes
Our winters cycle above and below freezing repeatedly rather than staying frozen. Every cycle expands and contracts the soil around a fixture stake, and over a couple of seasons a stake-mounted fixture that was set perfectly plumb can heave, lean, or rotate. That is the physical reason so many older installations have fixtures aimed at nothing in particular. Longer stakes, mounting to a buried block or a hardscape element where practical, and a scheduled re-aiming visit are the answers. Anticipate it rather than treating it as a failure.
Clay soil and trenching
Northern Virginia’s heavy clay is slow to dig, holds water, and does not backfill neatly. Trenching through it — especially across an established lawn — leaves a visible scar that needs proper restoration, not a scattering of seed. Cable routing should follow bed lines and mulch edges wherever possible, both to reduce turf damage and to keep runs accessible for future service. Clay also holds moisture against buried connections, which is exactly why connection quality matters so much here. Where a run has to cross lawn, plan the restoration into the job the way you would with any other landscape design and installation work, and coordinate with any existing irrigation and sprinkler system so a trencher does not find a lateral line the hard way.
Water, humidity, and corrosion
Everything outdoors here spends the summer in high humidity and the rest of the year cycling wet and dry. Fixtures and connections must be wet-location rated, and any fixture near a pool, a water feature or fountain, or a low spot that ponds after storms needs to be specified accordingly. Corrosion is the quiet killer of budget systems: aluminum fixtures with painted finishes chalk and pit, plastic housings become brittle in UV, and cheap connectors green over and lose contact. Cast brass and copper develop a patina and keep working.
Plants grow into the design
This is the most predictable and most ignored issue in the category. A fixture set at the drip line of a three-gallon shrub will be inside that shrub in three or four seasons. Foundation plantings in particular tend to swallow uplights whole. Good designs anticipate mature size, set fixtures where they will still have a clear throw later, and treat annual aiming as routine maintenance rather than a callback. If your beds are on a regular mulching and bed maintenance schedule, that is the natural moment to check fixture clearance.
HOAs, Neighbors, and Dark-Sky Courtesy
Northern Virginia has a high density of homeowner associations, and many of them have something to say about exterior lighting. Restrictions typically address brightness, whether fixtures are visible from the street, fixture color and finish, color temperature, and sometimes hours of operation. Some communities require architectural review for anything permanently mounted to the house. None of this is a reason to skip lighting, but it is a very good reason to check before you buy fixtures rather than after they are installed.
- Read your covenants for the words “lighting,” “illumination,” and “exterior fixtures” before you shop.
- Ask specifically whether low-voltage landscape lighting is treated differently from house-mounted fixtures — in many communities it is.
- If review is required, submit a fixture list with finishes, lumen output, and color temperature. Vague applications get bounced.
- Run our permit and HOA checker early, and confirm anything ambiguous directly with your association and county.
Beyond the rules, there is simple neighborliness. Light trespass — light crossing a property line where it is not wanted — is the most common source of friction, and it is entirely avoidable. Use shrouds, glare guards, and hex louvers on any fixture aimed toward a boundary. Aim away from neighboring windows. Keep uplights from spilling into the sky above the tree they are lighting, which is both wasted output and the essence of the dark-sky objection. On the tighter lots in Arlington and inside the Beltway generally, a shielded, restrained system is not a compromise — it is the better-looking design anyway.
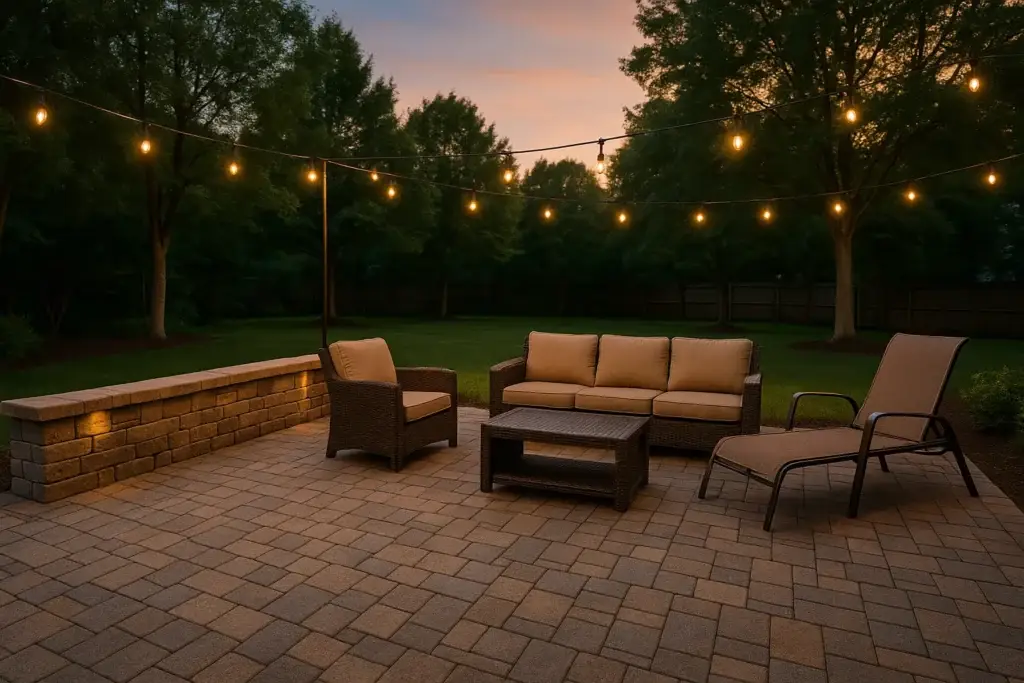
Design Lighting With Your Hardscape, Not After It
If there is one piece of sequencing advice that saves the most money in this entire category, it is this: run the lighting plan at the same time as the hardscape plan. Conduit, sleeves, and wire chases cost very little while the ground is open and the base is being compacted. They cost a great deal once there is a finished patio, a mortared cap, or a poured slab sitting on top of where the wire needed to go.
Sleeve before the pavers go down
A sleeve is simply a length of empty conduit laid under a patio, walkway, or driveway during construction, capped at both ends, with a pull string inside. It lets a future cable cross that surface without cutting anything. The material cost is trivial. Run sleeves anywhere a wire might plausibly need to cross a hard surface later — from the house side of a patio to the far bed, under a walkway to the opposite planting bed, across a driveway to the far side of the entry. Homeowners who put in two extra sleeves during a driveway and entrance project almost never regret it.
Wall, cap, and step lighting during the build
Hardscape fixtures are meant to be built in. A seating wall light sits in a void created as the block is laid. A riser light goes into a course as the steps are set. A cap light has its wire chase cut before the cap is mortared. Every one of these is straightforward during construction and awkward afterward. When Lawn Theory builds retaining walls and seating walls or a pool patio and surround, the lighting layout is worth settling at the same design meeting as the material selection — even if the fixtures themselves are installed in a later phase, the chases and sleeves should go in now.
Decks, pergolas, and overhead structures
Overhead structures are the best downlighting platform you can build on purpose. A pergola rafter, a pavilion beam, or a covered porch ceiling puts light exactly where it flatters people and food. Running that wiring through a post or a beam is easy while the structure is being framed and unpleasant afterward. The same is true of deck lighting: post cap lights, riser lights, and under-rail lighting all want their wire runs planned with the framing. If you are considering a deck or porch or a multi-level deck, the stair runs between levels are the highest-value lighting on the whole structure and the hardest to add later.
Fire features and outdoor kitchens
A fire pit or outdoor fireplace creates its own warm pool of light, so the surrounding lighting should be dimmer than you would otherwise plan — enough to define the seating edge and the path in, not enough to compete. An outdoor kitchen is the opposite: it needs real task light on the working surfaces, generally from above and under counter overhangs, on its own control zone so it can be bright while cooking and off while eating. Both are worth zoning separately from everything else, which is a decision made at the transformer and the controller, not at the fixture.
Security and Safety, Honestly Framed
Landscape lighting is frequently sold on security, and the claims often outrun what anyone can actually support. Here is the honest version.
What lighting genuinely does: it makes walking surfaces, steps, and grade changes visible, which is a real and immediate reduction in trip and fall risk — the most common way people are actually injured in a yard at night. It eliminates the deep shadow pockets beside a garage, behind shrubs, or along a side yard where nobody has any reason to be. It makes it possible to see who is at your door before you open it. It makes cameras dramatically more useful, because a camera can only record what is illuminated, and a warm, even, low-level light produces far better footage than a single blinding motion floodlight that blows out the image.
What we are not going to tell you: that lighting reduces crime by any particular percentage, that it guarantees anything, or that a lit house is never a target. Anyone quoting you a crime statistic in a lighting sales pitch should be asked for the source. Treat lighting as one sensible layer among locks, sightlines, cameras, and simple habits — not as a security system.
One design note that matters more than most people realize: very bright, high-contrast lighting can actually make it harder to see. A blazing floodlight over a garage creates a pool of glare and a wall of black beyond it, and your eyes cannot adapt fast enough to see into that darkness. Even, moderate, warm illumination across a property gives you far better usable vision at night than a few intense sources. If security is your motivation, the answer is more places lit gently, not fewer places lit harshly.
Professional Systems Versus Big-Box Kits
The gap between a boxed kit from a home center and a designed professional system is not mainly about looks on day one. It is about what the system is like in year five. The differences are concrete and you can inspect every one of them before you buy.
| Component | Typical big-box kit | Professional-grade system | Why it matters over time |
|---|---|---|---|
| Transformer | Small single-tap unit, often sized to exactly the kit’s load | Multi-tap stainless or powder-coated unit with spare capacity | Headroom for expansion and voltage taps to correct drop on long runs |
| Fixture material | Painted aluminum, composite, or plastic housings | Cast brass or copper, sometimes marine-grade stainless | Brass and copper patina and keep working; painted aluminum chalks and pits, plastic goes brittle in UV |
| Connectors | Twist-on wire nuts or pierce-through clips | Silicone-filled, waterproof direct-burial connectors | Twist-on connectors wick moisture, corrode, and fail intermittently — the number one cause of dead fixtures |
| Cable | 14 or 16 gauge, short pre-cut lengths | 12, 10, or 8 gauge direct-burial, sized per run | Thin wire on a long run means dim, mismatched fixtures at the far end |
| Wiring layout | Daisy-chain by default | Hub-and-spoke with service loops at each fixture | Consistent brightness and single-point troubleshooting instead of tracing a chain |
| Optics | Fixed beam angle, no adjustment | Interchangeable optics, adjustable aiming, glare guards available | Lets you re-aim and re-spread as plants mature instead of replacing fixtures |
| Controls | Basic mechanical timer or built-in photocell | Astronomic timer, photocell, or app-based zone control | Astronomic timers follow the changing sunset instead of needing resetting every few weeks |
| Warranty and service | Limited product warranty, no labor coverage | Manufacturer warranty on fixtures plus a workmanship warranty from the installer | Determines whether a failure in year four is a phone call or a project |
| Serviceability | Discontinued lines, unmatched replacements | Fixture line still in production, replacement modules available | You can add a matching fixture in year six without the new one looking different |
The connector row deserves emphasis because it is the single most common failure point. A twist-on wire nut is designed for a dry electrical box indoors. Buried in Northern Virginia clay that holds water for days after a storm, it wicks moisture into the conductor, corrodes, and produces a fixture that works some nights and not others — the most maddening kind of fault to chase. Silicone-filled direct-burial connectors are inexpensive and they simply do not do that.
Where DIY genuinely makes sense
A capable homeowner can absolutely do a small system: a handful of fixtures on a short run, in beds, near the house, with no long-distance zones and no hardscape integration. If that describes your project, buy good connectors and 12-gauge cable even if the rest is modest, and lay everything out on the ground and live with it for a night or two before you dig.
Bring in a professional when the property is large enough that voltage drop is in play, when lighting is being integrated into hardscape under construction, when you want techniques like moonlighting from high in a mature canopy, when trenching has to cross established lawn or existing irrigation, or when you simply want a design rather than an assortment of fixtures. Design skill is the part that cannot be bought in a box.
Controls: Timers, Photocells, and Smart Systems
Controls are where a good system becomes a system you actually enjoy. The basic options, in order of sophistication:
- Mechanical or digital timer. On and off at fixed clock times. Cheapest, and immediately wrong — in Northern Virginia sunset moves by more than four hours between June and December, so a fixed timer needs constant resetting.
- Photocell. Turns on at dark and off at light. Simple and self-correcting, but it runs the system all night unless paired with a timer, and it can be fooled by a nearby streetlight or by leaf cover over the sensor.
- Astronomic timer. Knows your latitude and calendar date and calculates actual sunset and sunrise, so “on at dusk, off at 11 p.m.” stays true all year with no intervention. For most homeowners this is the right answer.
- Zoned and app-controlled systems. Separate the front from the back, the ambiance layer from the task layer, the fire pit area from the kitchen. Set the front to run until midnight and the rear patio to run only when you are out there. Zoning is a wiring decision made at install, so decide before, not after.
- Motion control on specific zones only. Side yards, utility areas, and service doors are good candidates. Never put your ambiance zones on motion — lights snapping on and off destroys the effect you paid for.
A note on dimming: if your system supports it, use it. Almost every property looks better at 60 to 70 percent than at full output, and the ability to dial back after living with the system for a week is worth more than any single fixture upgrade.
What Actually Drives the Cost of a Lighting Project
We are not going to publish invented dollar figures, because landscape lighting pricing is driven almost entirely by variables that only a site visit resolves. What we can do is tell you exactly which variables move the number, so you can read a quote intelligently and compare two proposals that look different for a reason.
- Fixture count. The most obvious driver, and the one most worth questioning. More fixtures is not better design.
- Fixture material and grade. Cast brass and copper cost more than painted aluminum, and considerably more than composite. This is where the durability difference lives.
- Transformer capacity and count. A single small transformer versus a large multi-tap unit, or two units to serve distant zones on a big lot.
- Run length and wire gauge. Long distances mean heavier cable and more of it. This is why the same fixture count costs differently on a half-acre lot in Vienna than on three acres outside Leesburg.
- Trenching distance and surface restoration. Cable in mulched beds is quick. Cable crossing an established lawn, a root zone, or a driveway is slow, and the restoration is part of the job.
- Tree mounting. Downlights high in a canopy require climbing or lift access and careful cable management. They are worth it, and they are not the same labor as a stake in a bed.
- Controls. A basic photocell versus an astronomic timer versus a zoned, app-controlled system with dimming.
- Integrated versus retrofitted. The single largest swing factor. Lighting designed into a wall, patio, or deck while it is being built is a fraction of the labor of adding it to a finished structure.
- Site access and obstacles. Steep grades, narrow side yards, existing irrigation, and mature root systems all slow installation.
Two practical moves. First, sketch your zones in the lighting designer before you request quotes, so every contractor is pricing the same scope. Second, if you are weighing lighting against other exterior improvements, our home value ROI calculator is a useful way to think about where a budget goes furthest across a whole property rather than one project at a time. Phasing is also legitimate: many homeowners install the front and the primary rear zone first, leave transformer capacity and sleeves for the rest, and expand later.
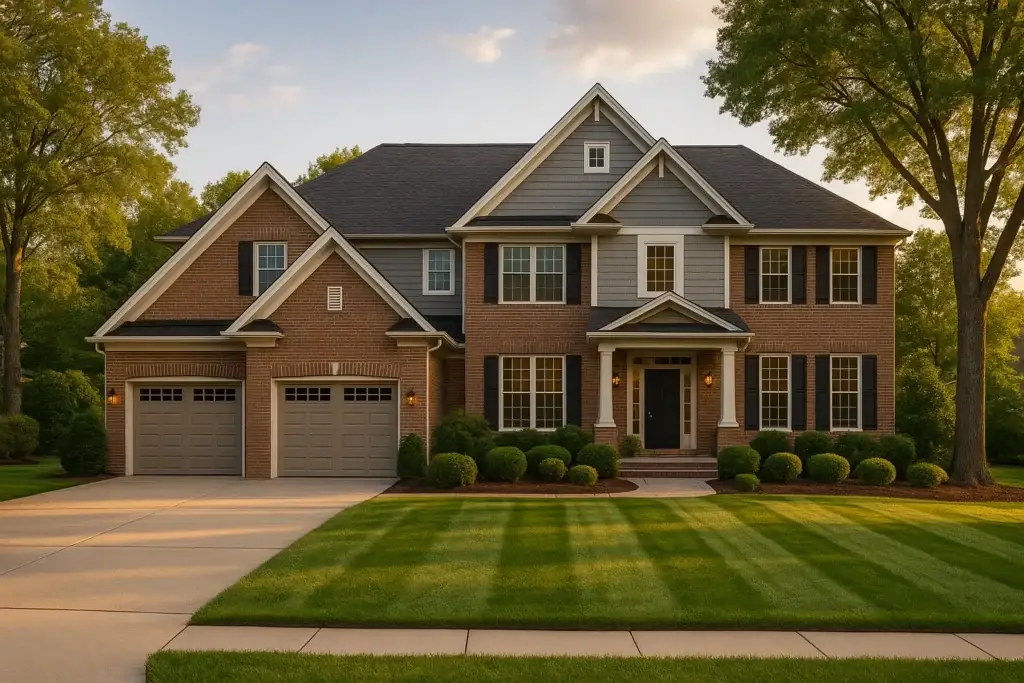
A Year-Round Maintenance Calendar
Landscape lighting is not install-and-forget. Plants grow, soil moves, lenses cloud, and leaves bury things. Twenty minutes a season keeps a system looking the way it did the night it was energized.
| Season | What to do | Why it matters here |
|---|---|---|
| Early spring (March–April) | Walk the system at night. Straighten and re-plumb every heaved stake, re-aim anything that shifted, and reset timer schedules. | Freeze-thaw cycling over the winter is the number one cause of fixtures pointing at nothing. |
| Late spring (May–June) | Clean lenses and glass. Trim back foundation plantings and perennials that have grown in front of fixtures. Check that mulch has not buried any fixture bases or connections. | Fresh mulch is applied over the top of low fixtures every year without anyone noticing. |
| Summer (July–August) | Re-aim uplights as canopy fills in. Verify downlight mounts still have cable slack and are not girdling a growing limb. | Full leaf-out changes every tree effect from what you set in March. |
| Early fall (September) | Full seasonal check before the dark season: inspect connections, confirm transformer schedule against the earlier sunset, replace any failed fixtures while the weather is pleasant. | This is when you start using the system heavily again, and when problems become obvious. |
| Late fall (October–November) | Clear fallen leaves off and around fixtures, especially path and well lights. Check that grading and gutter runoff have not washed soil over anything. | Leaf litter smothers path lights and traps moisture against fixtures and connections. |
| Winter (December–February) | Keep snow and ice off fixture lenses; never pile shoveled snow on a light. Do not let a plow or shovel edge catch a driveway-side fixture. | Physical damage from snow clearing is far more common than electrical failure. |
| Every few years | Re-evaluate the whole design as plantings mature. Replace aging bulbs or modules, refresh corroded hardware, and consider whether fixtures should move. | A design that fit a five-year-old landscape rarely fits a ten-year-old one. |
Two of these overlap neatly with work you may already schedule. The late-spring lens cleaning and trim-back fits alongside bed refreshing, and the leaf-season check fits alongside leaf removal and seasonal cleanup. Bundling them means one visit instead of two.
Ten Mistakes That Ruin Otherwise Good Systems
- Over-lighting. The dominant error of the LED era. If the yard reads as bright rather than as atmospheric, there are too many fixtures or too much output.
- The runway. Identical path lights at identical spacing down a straight walk. Fewer fixtures, unevenly spaced, always looks better.
- Uplighting into windows. A beam that overshoots its subject and lands in a bedroom. Check every uplight from inside the house at night.
- Mismatched color temperatures. Warm fixtures next to cool ones in the same sight line make an expensive system look assembled from leftovers.
- An undersized transformer. Fully loaded on day one, so the first addition means new equipment.
- Twist-on connectors buried in mulch. They wick water, corrode, and produce intermittent faults that are miserable to trace.
- Ignoring mature plant size. Fixtures placed at today’s drip line disappear inside the shrub within a few seasons.
- Visible glare sources. If you can see the lamp instead of the lit surface, the fixture needs a shroud, a louver, or a different position.
- Wire too thin for the run. The far end of the system reads dim and slightly off-color, and no amount of re-aiming fixes it.
- Adding lighting after the hardscape is finished. Every wall light, step light, and cross-patio run becomes harder, uglier, and more expensive.
Frequently Asked Questions
When is the best time of year to install landscape lighting in Northern Virginia?
Late summer and early fall are ideal. The ground is workable, beds are visible so fixture placement is obvious, and you get the benefit immediately as evenings shorten through September and October. Spring is the second-best window. Winter installation is possible but frozen or saturated clay makes trenching slow and restoration messier.
How many fixtures does an average front yard need?
There is no honest average, and anyone who quotes one is guessing. The number depends on the width of the facade, how many focal points you actually want, the length and shape of the walk, and how much of the work the trees can do. What matters more is the mix: a front that has two or three uplights, a graze on the facade or a stone element, and three or four path lights almost always outperforms a front with ten path lights and nothing else.
What color temperature should I use on a brick colonial?
Warm — in the 2700K to 3000K range. Red brick, mortar, and painted colonial trim all contain warm pigments that go flat and gray under cooler light. At 4000K and above a brick colonial starts reading like an institutional building. If you want a slightly different treatment on foliage, stay within a small step of your architectural temperature and never mix noticeably different sources within one sight line.
Do I need a permit for low-voltage landscape lighting?
Requirements vary by jurisdiction and by what else is happening on the project. Low-voltage wiring downstream of a plug-in transformer is generally treated very differently from new line-voltage circuits, and any new circuit, panel work, or permanently wired exterior fixture is electrical work that belongs to a licensed electrician and may require a permit and inspection. Because lighting often accompanies a wall, deck, or patio, check the whole scope with your county — Fairfax, Loudoun, and Prince William each publish their own requirements — and verify before you start, since these change.
Can landscape lighting be added to an existing patio or retaining wall?
Yes, but expect compromises. Freestanding fixtures around the perimeter and downlights from nearby trees or an existing structure retrofit easily. Integrated wall and step lights require cutting into finished masonry to create a wire chase, which is doable but slower, costlier, and rarely as invisible as an original install. If any hardscape work is still in your future, get the sleeves and chases in now even if the fixtures come later.
How long do LED landscape fixtures last?
Far longer than halogen, but “lasts” means two different things. The light engine typically outlives several halogen lamp cycles. The housing, gasket, lens, and connections are what actually determine service life outdoors, and that is a materials question — cast brass and silicone-filled connectors versus painted aluminum and wire nuts. Ask whether the light source is a replaceable module or integrated into the fixture, because that decides what a failure costs you in year eight.
Will landscape lighting make my home more secure?
It helps in specific, describable ways: steps and grade changes become visible, dark hiding spots beside garages and along side yards are eliminated, you can see who is at the door, and security cameras produce far better footage with even ambient light than with a single blinding floodlight. It is not a security system and we will not quote you crime statistics. Treat it as one useful layer alongside locks, sightlines, and cameras.
Why are some of my fixtures dimmer than others?
Almost always voltage drop, a failing connection, or both. If the dim fixtures are the ones farthest from the transformer, the run is too long for the wire gauge or too heavily loaded — the fixes are heavier cable, splitting the load across more runs, a higher voltage tap, or a second transformer. If the dim fixtures are scattered randomly, suspect corroded connectors, which is the classic symptom of twist-on wire nuts buried in wet clay.
My HOA restricts exterior lighting. What can I still do?
Usually more than homeowners assume. Most restrictions target brightness, visible fixtures, color, and house-mounted equipment — not low-voltage, shielded, warm, in-bed lighting. Shrouded uplights, hardscape-integrated step and wall lights, and downlighting from trees are all low-profile by nature. Read the covenants for “lighting” and “illumination,” submit a fixture list with finishes, lumens, and Kelvin if review is required, and start with our HOA and permit checker.
Should I light every tree in my yard?
No. Hierarchy is what makes a design read as designed. Choose two or three trees with genuine structure — a mature oak, a well-formed maple, an ornamental with a distinctive silhouette — and light those properly with cross-lighting or a canopy downlight. Leaving the rest dark is what makes the lit ones look like focal points instead of a wall of glare.
Planning Your Northern Virginia Lighting Project
Start with the night walk. Do it this week, before daylight gets much shorter, and write down the three lists: where you cannot see, what you want to look at, and where you actually sit. That single page is worth more than any fixture catalog, and it turns a vague “we should do some lighting” into a scope a designer can price.
From there, sketch your zones in the outdoor lighting designer, and if a patio, wall, deck, or pergola is anywhere in your plans, get the lighting onto that drawing now. Lawn Theory handles landscape lighting installation as part of the same conversation as the structure it belongs to — including Ashburn, Great Falls, and McLean — alongside our wider outdoor living construction work.
If you want more background before you commit, read our overviews of outdoor living spaces in Northern Virginia and building outdoor living areas in this region, browse the rest of our blog, or look at how we structure our services. You can also learn more about our team.
When you are ready for a design rather than a fixture list, contact us to schedule a walkthrough. Evening site visits tell us more in twenty minutes than any daytime measurement ever will — and September is exactly the right month to have that conversation.
Keep Reading: Outdoor Building
 Outdoor Building
 Do You Need a Permit for a Patio, Deck, or Retaining Wall in Northern Virginia?
Do you need a permit for a patio, deck, or retaining wall in Northern Virginia? Verified Fairfax, Loudoun, and Prince William thresholds…
 Outdoor Building
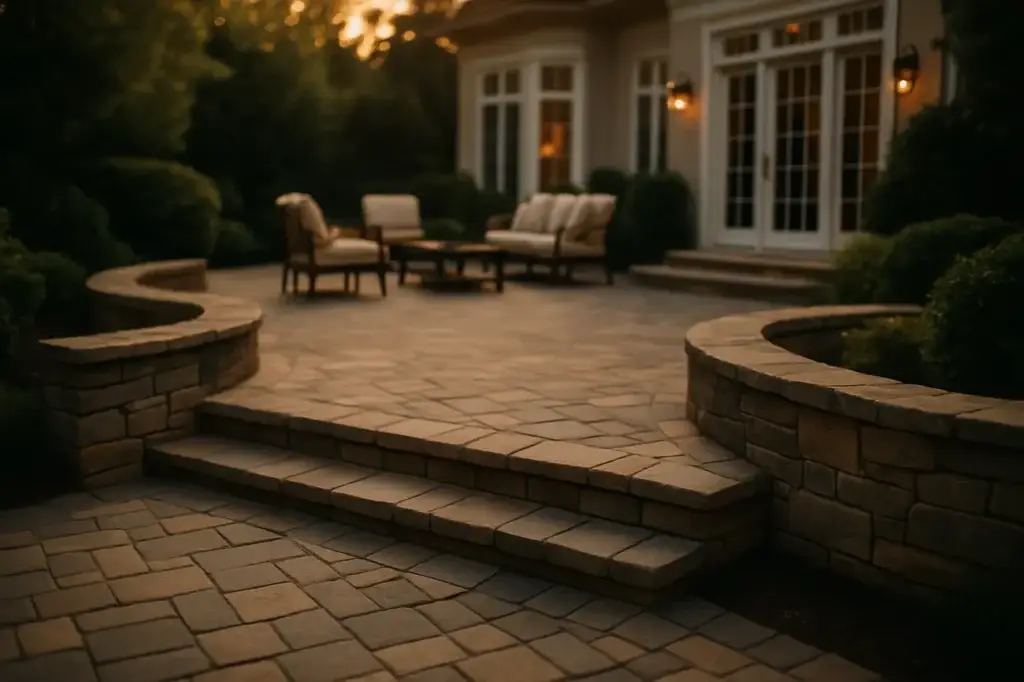
 Paver Patio Cost Factors in Northern Virginia: What Actually Moves the Number
Paver patio cost in Northern Virginia is driven by size, base engineering, material tier, and site access. Here is what raises each…
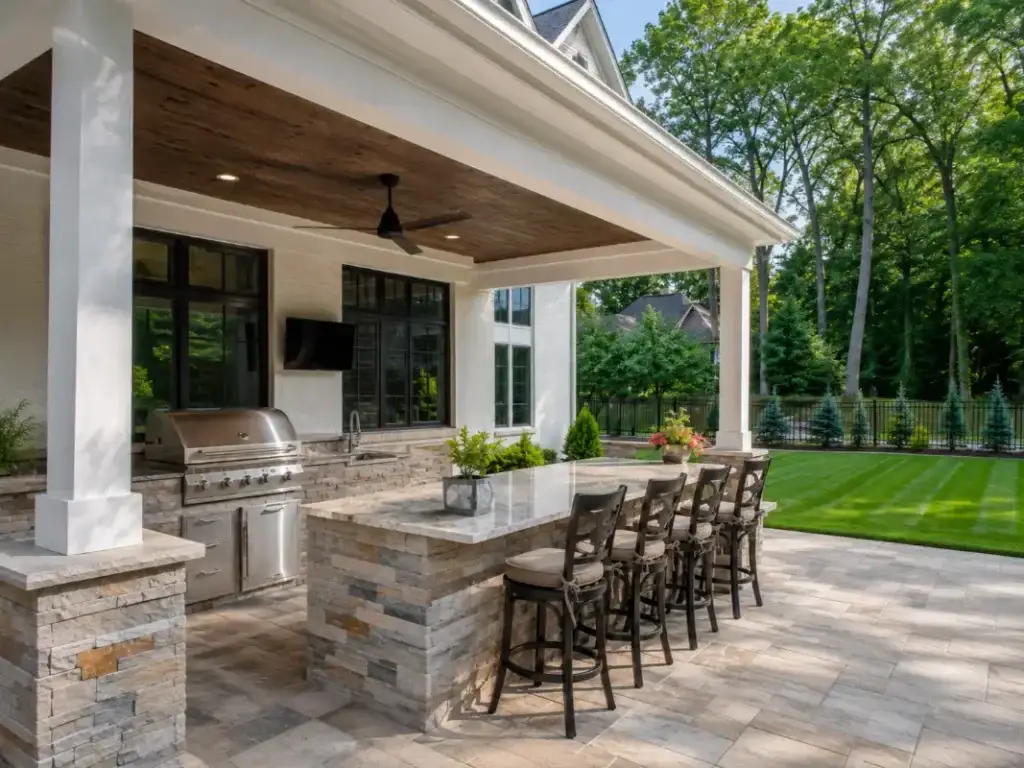 Outdoor Building
 How Much Does an Outdoor Kitchen Cost in Northern Virginia? The 2026 Guide for Loudoun and Fairfax Homeowners
Here is the direct answer you came for: an outdoor kitchen in Northern Virginia starts at $18,000 for most residential builds in…
Want this handled by the crew that wrote the guide?
Veteran-owned. Licensed & insured. Free walkthroughs across Northern Virginia — quotes in 24–48 hours.
Get Your Free Estimate